

Drawings Of Bushes And Trees
Brian is a huge fan of nature and loves to spend a lot of time out in it with his family, especially in the form of gardening.
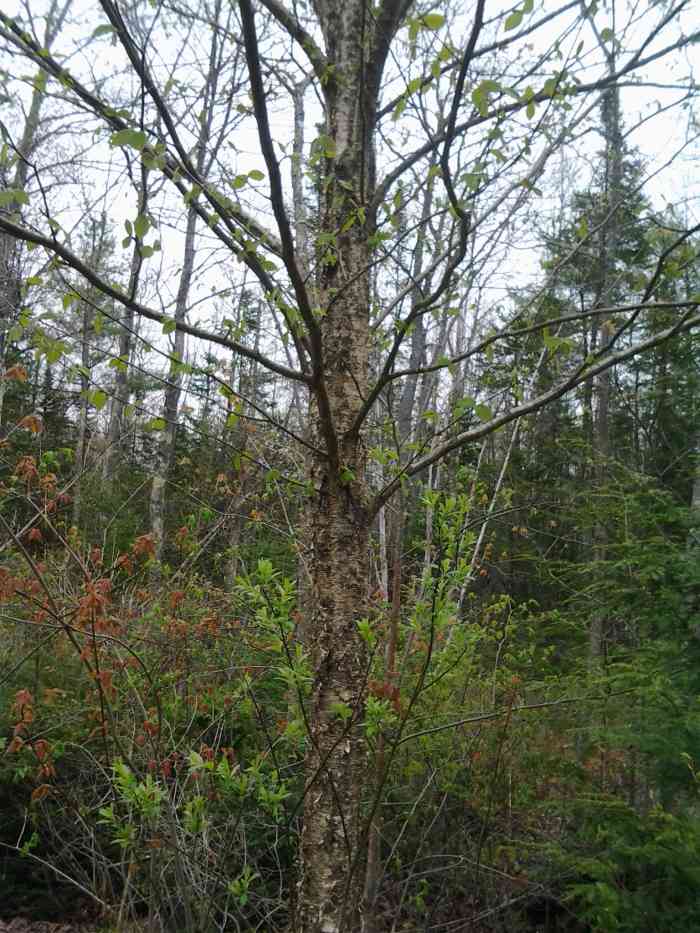
This is a yellow birch that I am curious to see if I can get to grow from a cutting.
Brian Hussey
Trees and Bushes Can Be Hard to Grow
Do you have a particular tree or bush in mind you want to plant? Having trouble getting seeds for it or getting a seed started? Trees and bushes can be hard to grow. I have tried many times and failed a good amount. I find that planting them from seed is a very delicate matter. Once sprouted, the sapling can easily wither due to harsh weather, too much or too little water, or a lack of sufficient light, and now you are back at the drawing table.
If you know what you want to duplicate, however, you can instead grow that tree or bush by getting a cutting from it in early spring, preferably before they flower (if it's a flowering plant). This guide will show you how to do it.

A selected cutting for planting.
Brian Hussey
How to Get a Good Cutting
To get a good cutting, you want to go to the tree or bush and bend a new growth. If you can bend it in half without it breaking, it is too soon. If you bend it and it breaks easily, it is too woody and you need a fresher shoot.
You will also get a better chance of the cutting you choose eventually rooting and growing if you get it after a rainstorm and as early as you can get it after sunrise. That way, the cutting has as much water stored internally as it needs.
Now, the cutting you want should have some leaves growing already. A few sets of leaves will help promote energy in growth. So with trees and bushes, I don't like to get a cutting smaller than 6 inches. You can go up to 3 feet long, but I usually try to keep it at no more than a couple feet.
How to Snip the Cutting
To cut the shoot or cutting, you should cut at a slight angle just a quarter of an inch below a leaf. (You want it as clean of a cut as you can get it.) With my 6-inch cutting, I will then pinch off the leaves 3 inches upward from the slice.
You now have a cutting, and you are now ready to do one of a couple things (or both if you want). You can put the cutting in a potato, or dip it in a rooting hormone. In this guide, I will show you how to do both.

Make a slightly angled, clean cut just below the leaf.
Brian Hussey
How to Make Your Own Willow Rooting Hormone
These simple directions will show you how to make your own willow rooting hormone to help your cutting take root. Here's how to do it:
Supplies You'll Need:
- Glass jar
- Boiling hot water
- Handful of your newest, greenest willow twigs, cut into 1-inch pieces
Step 1: Prepare Your Willow Twigs
Go out to a willow tree and get some new twigs, as green as you can get them. Cut the twigs into 1-inch pieces with the leaves stripped off. They should be soft enough that you can use scissors to cut them. Cut enough twigs to fill 1/3 of whatever glass jar you plan to use. (I generally use a quart-sized Mason jar, but I sometimes opt for a pint-sized one.)

Cut the willow branch into 1-inch twigs.
Brian Hussey
Step 2: Pour Boiling Hot Water Over Twigs
Boil water in a tea pot, or any pot you have handy, and pour it over the willow pieces in the glass jar until the jar is filled. (Like you're making tea.)

Pour boiling water over the twigs in the glass jar.
Brian Hussey
Step 3: Let the Jar Steep for Over 24 Hours
Cover the jar and put in a windowsill for 24 hours (or longer if you want the hormone to be really strong).
Note: The water in the jar will change color as it steeps.

Let the jar with the twigs and hot water steep on a windowsill for at least 24 hours (and up to a few days). The water will change color as it steeps.
Brian Hussey-Willow Hormone Project
Step 4: Strain Out the Rooting Hormone
Once it's steeped for at least a day, pour the willow water over a strainer to get the twigs out. Put the jar of the liquid rooting hormone in the fridge. It will keep for two months if refrigerated.
Note: To use the rooting hormone, soak the cutting in the liquid for a few hours. Then plant the cutting into a pot of soil or right into your desired spot in the yard.
Willow Rooting Hormone (Willow Water)
How to Grow a Cutting Using a Potato
This is a very odd notion but one I know works well, especially with rose cuttings. I have a few friends who like to experiment with gardening (along with myself), and we try lots of things. So when we found out you can put a cutting in a potato to help it root, I was all over it. I am currently in the process of trying it with a few different types of trees and bushes and will update as I get my results.
Now, this is a pretty simple procedure. The hard part is done after you have found and made your cutting. So here goes.
Supplies You'll Need:
- Potatoes
- A screw or drill
- A pot with soil (unless you plan to plant the cutting in the ground)
Step 1: Gather Your Supplies
Go to the grocery store or farm stand and pick up some potatoes. Some recommend the Irish potato or a good, round potato. I used a russet, which tends to lean towards the oblong.
If you don't have a spot to plant your cuttings, you can plant them in a pot as I did. At this point it does not really matter what soil or dirt you use (you can even use sand for this initial part). Until the cutting takes root, it gets what it needs from the moisture and the potato. Just make sure the dirt used is moist, but not wet. I will sometimes spritz the dirt with a spray bottle, instead of pouring water into the dirt.
Step 2: Drill a Hole Into Your Potato
Once you have a cutting, your potato, and a pot with dirt, you can then take your potato and poke a hole in it. I used a long screw to poke a hole. Some might advise using a drill, depending on the width of your cutting.
Don't go completely through the potato, but drill in as close to 3 inches as you can get. (I usually initially plant a cutting 3 inches into the ground, though some go as deep as planting most of the shoot in the ground.)
Note: It is not advised to do the hole-poking with the actual cutting. They are very finicky. You want a clean cut on the bottom of the shoot, and it needs to stay that way.

Poke a hole in the potato with a screw or drill.
Brian Hussey
Step 3: Insert the Cutting Into the Potato
Go ahead and insert your cutting into the hole you just poked in the potato.
Note: If you want to be a little extra cautious about getting the cutting to grow, you can dip the cutting in the rooting hormone and then place it in the potato.
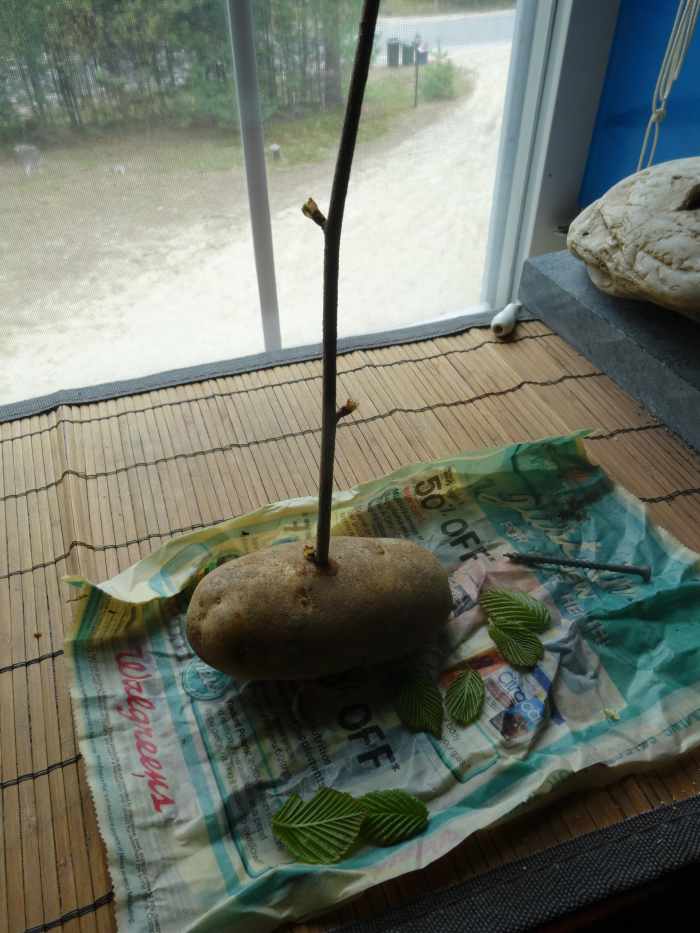
Place the cutting into the hole made in the potato.
Brian Hussey
Step 4: Plant the Potato in the Soil
With your cutting sticking out of your potato, take your pot of dirt (or go to your desired planting location) and plant the potato. Cover the potato so that just the cutting is sticking out of the dirt.
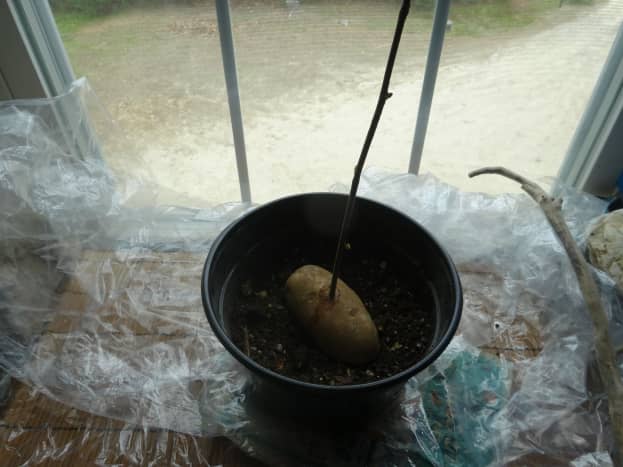


Plant the potato in moist, but not wet, dirt.
Step 5: Transplant Your Cutting
It normally takes a few weeks to get a good growth of roots. So if you want to know if it is ready, lightly pull on the cutting. If it resists slightly, it is developing roots.
If you receive confirmation that it is indeed growing roots, you can wait a few more days, or you can immediately transplant it into your desired location (unless you started off there, in which case you're all set).
Just make sure that once you plant it in the spot you want that it has the appropriate soil for the plant to thrive. Some plants need certain fertilizer or soil that has a particular pH balance.
This article is accurate and true to the best of the author's knowledge. Content is for informational or entertainment purposes only and does not substitute for personal counsel or professional advice in business, financial, legal, or technical matters.
Mary Hyatt from Florida on December 14, 2014:
I recently downsized and had to give up my house. I had an old fashioned tea rose that was well over 10 years old. It was too large to move, so now I am in the process of trying to root the rose. I researched the web and only found out about using a potato, so it was nice to read you use that method, too. It is too soon to know if mine will be a success. I have 10 rootings. I did try four of them in water, only.
Great informative Hub. Voted UP, etc.
BDhire on July 11, 2014:
wow really great idea :)
Brian Patrick Hussey (author) from Durham, Maine on July 11, 2014:
I have a few cuttings going right now. I tried to do a cutting from the yellow birch but I think I did not cut a young enough cutting. I have a fire bush and a mystery purple flowered tree that I am getting to grow and it seems to be doing good so far. I did however start later in the season than I had planned due to a property being sold so I needed the cutting before the purchase was finalized.
Ciaran Moore from Ireland on July 11, 2014:
The potato idea is a bit weird , but good to know, nice article!
Randy Godwin from Southern Georgia on July 11, 2014:
Love the potato rooting idea, Brian. I'm a retired farmer and have used many methods of rooting both ornamental and native trees, not to mention various vegetable and flowering plants. Can't wait to try the spud rooting method. Great hub! Voted up!
Hussain Shah from Lahore, Pakistan on July 11, 2014:
Very good and amazing hub. Your content is very interesting and your writing skills are one of the best I have found on Hubpages. Keep it up!
Chitrangada Sharan from New Delhi, India on July 11, 2014:
Congratulations for HOTD!
This sounds interesting and I am going to try this. Thank you for providing the step by step instructions. I have grown plants by cutting method but the potato method is new for me.
Thanks for sharing!
Drawings Of Bushes And Trees
Source: https://dengarden.com/gardening/Creating-a-Mini-GreenHouse-Using-a-Recycled-Plastic-Bottle
Posted by: leclaircamigat.blogspot.com
0 Response to "Drawings Of Bushes And Trees"
Post a Comment