How To Create Signature In Mozilla Thunderbird

In this article, you can learn about three methods on how to set up an email signature in Mozilla Thunderbird. It can be achieved:
- by using HTML code directly in Account settings,
- by importing a previously prepared HTML file containing an email signature,
- or simply creating the signature in the email body and then copying its code to the Thunderbird settings.
Follow the steps below to learn more about all three methods.
Method 1: Create an email signature directly in HTML editor
In order to create an email signature in Mozilla Thunderbird using HTML editor follow the steps below:
- Open Mozilla Thunderbird.
- Click on your email account name e.g. maryluck@company.com and then on View settings for this account option under the Accounts section.
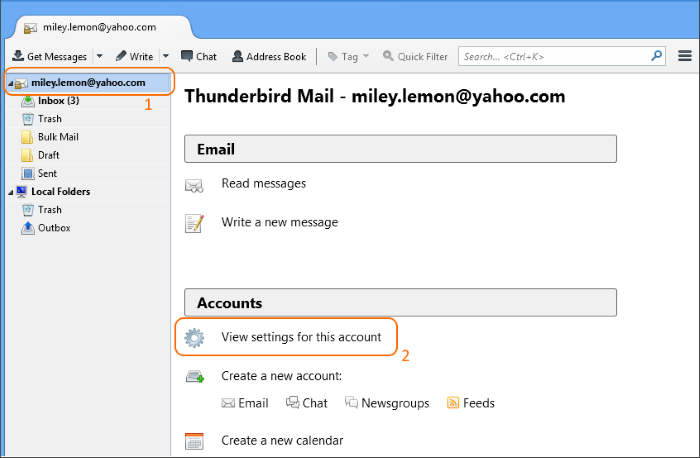
- In the Account settings window go to the Signature text section.
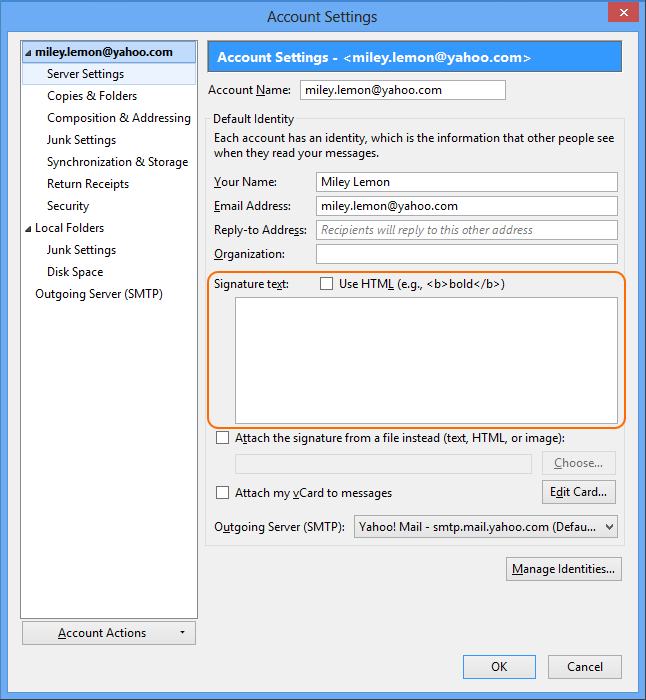
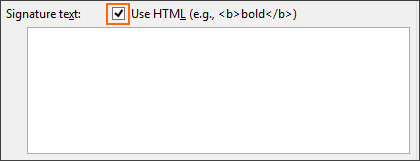
- In order to use HTML code you need to check the Use HTML box.
- Now you can create a signature directly in the Signature text field by typing in HTML code.
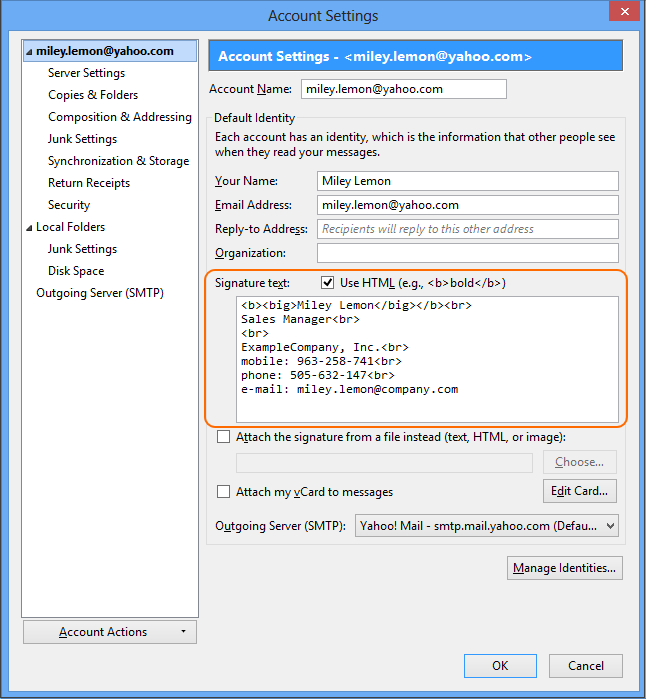
- When the HTML code of your signature is ready, click OK.
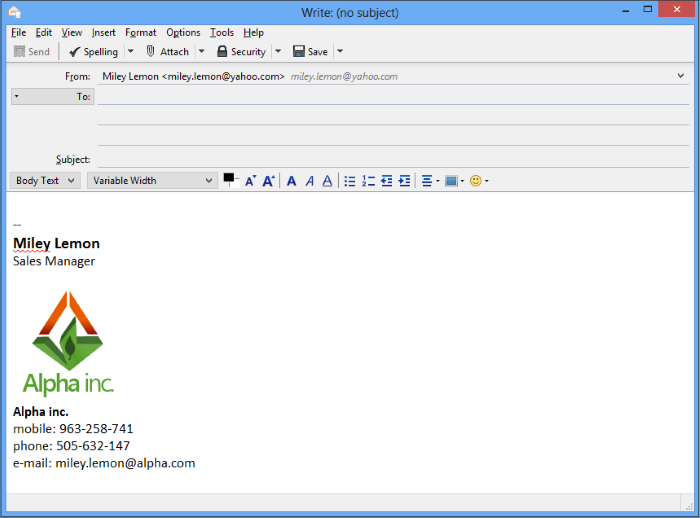
- Now, go to the main view of Thunderbird and click Write to create a new email message.
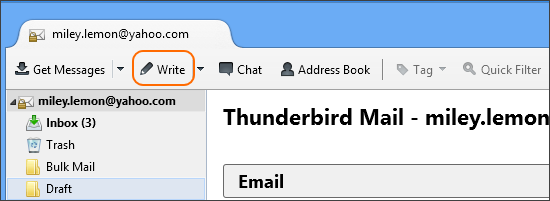
- Your new email signature should be already there.
Method 2: Import a file (HTML, text or image) containing your email signature
In order to follow these steps, you need to create a file containing your email signature. The file can be HTML, text or image type. If you do not have one or do not want to prepare the file by yourself, you can download one of our ready-made signature templates. When the file is ready, follow the steps below to insert it into the Thunderbird email client.
- Open Mozilla Thunderbird.
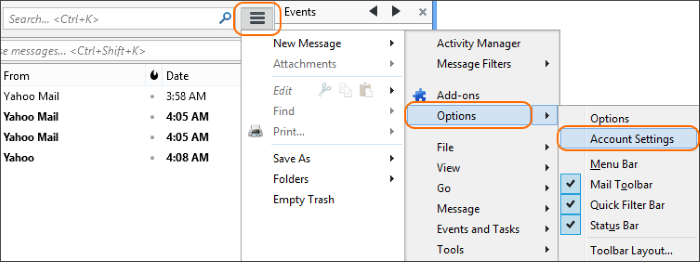
- Go to Account Settings. You can access them as described in step 2 of previous method or open Thunderbird menu, then click Options and Account Settings.
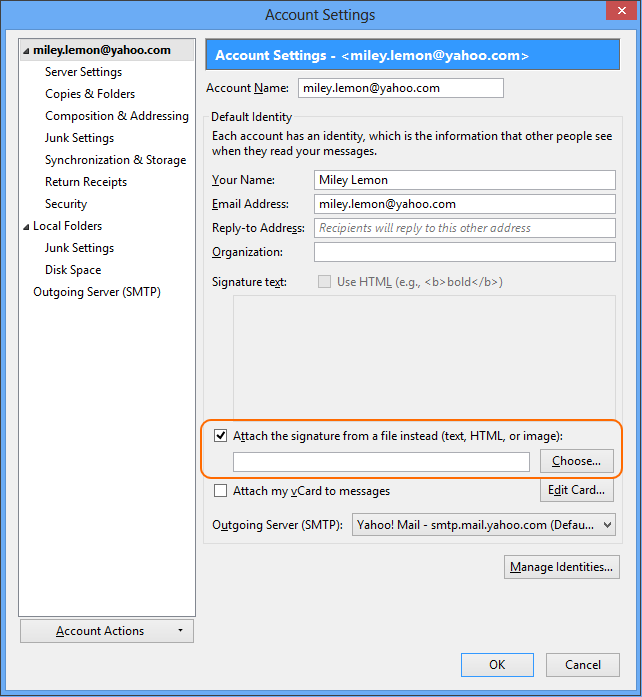
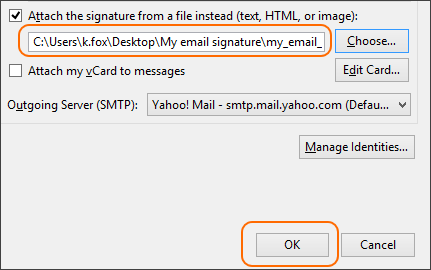
- Check the Attach the signature from a file instead (text, HTML, or image) box and then select a file containing your email signature by clicking the Choose… button.
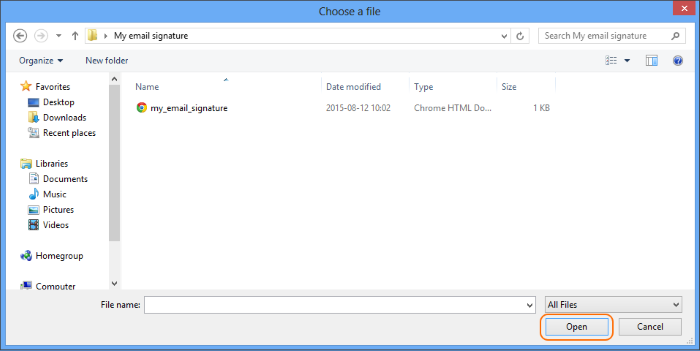
- Select the HTML file with your email signature and click the Open button to insert it into your account.
- Once the file has been attached, click OK.
- Your signature should be already available in every new email message. To check that, go to the main view of Thunderbird and click the Write button to see the result.

Method 3: Create an email signature in the body of a new message
You can also design your email signature in the new message body by using available formatting tools. Thanks to this method, you can see the result right away and modify any part of the signature if necessary. Learn more on how to achieve that by following the steps below:
- Open Mozilla Thunderbird.
- Go to the top menu and open a new message by clicking the Write button.
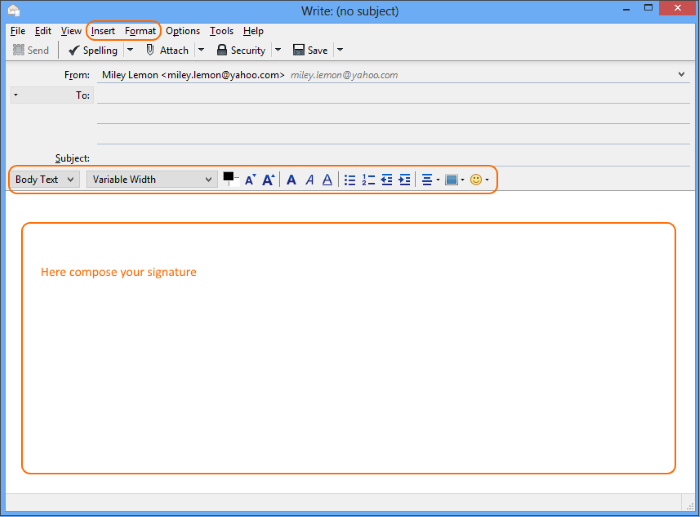
- In the new message window, you can compose your email signature using a basic toolbar or, to adjust it to your needs, you can use available formatting options under the Insert and Format tabs as well.
- Once the signature is composed, select all in the email body. You can do that by pressing the combination of Crtl+A on the keyboard or going to the Edit tab and then clicking the Select All option.
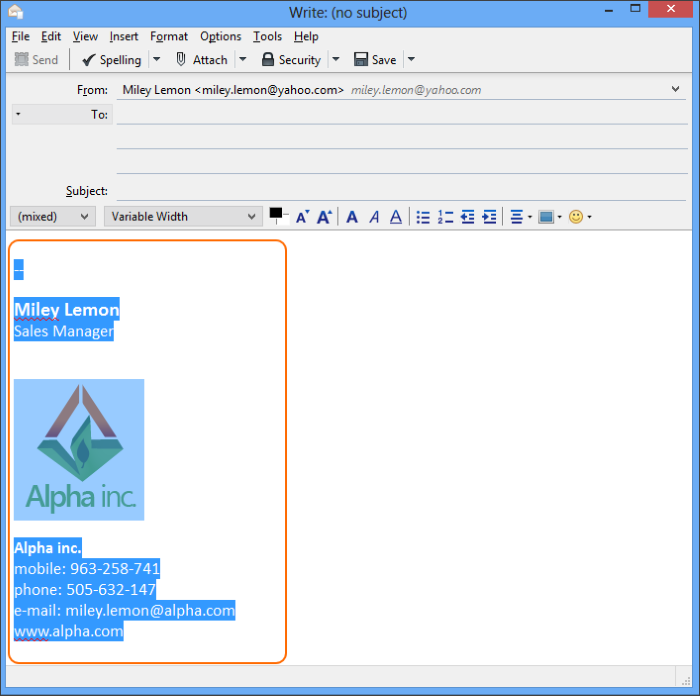
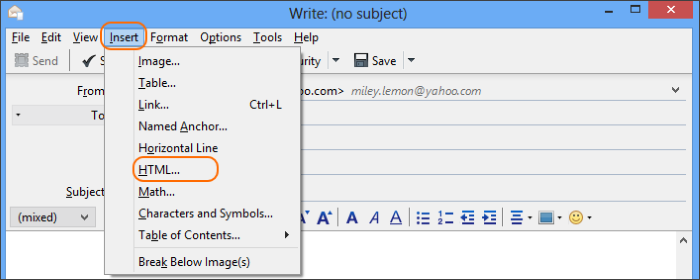
- Once the whole signature has been selected, go to the Insert tab and then click the HTML… option.
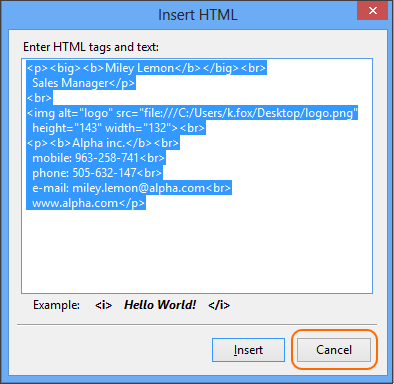
- In a new pop-up window, you should see your signature in form of HTML code. Copy this text and click Cancel as we do not want it to be inserted at this moment.
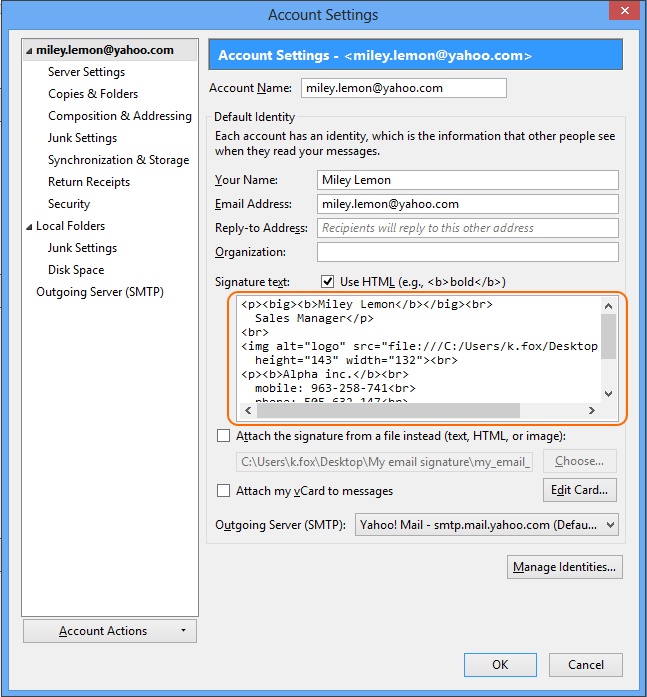
- Now go to the Account settings. (to see a more detailed instruction on how to access them, please refer to step 2 in the previous method).
- In the Account settings window, you need to paste the copied HTML code into the Signature text section. Please make sure that the Use HTML box is checked.
Note: Instead of composing your email signature in the email body, you can use this email signature generator, which really simplifies the process. When you have finished creating the signature, copy the HTML code from the signature generator and paste it into the Signature text section in Thunderbird.
- Click OK to save changes.
- Go to the main Thunderbird view and click the Write option to open a new message. Your email signature will be there.

From now on, you do not need to worry about creating a good-looking signature every time you want to send an email as your email signature is already inserted into the message body.
Suggested reading
Learn more on how to manage email signatures centrally
Business email signatures – best practices
Images in email signatures – linked or embedded?
How To Create Signature In Mozilla Thunderbird
Source: https://www.mail-signatures.com/articles/how-to-set-up-email-signature-in-thunderbird/
Posted by: leclaircamigat.blogspot.com

0 Response to "How To Create Signature In Mozilla Thunderbird"
Post a Comment