

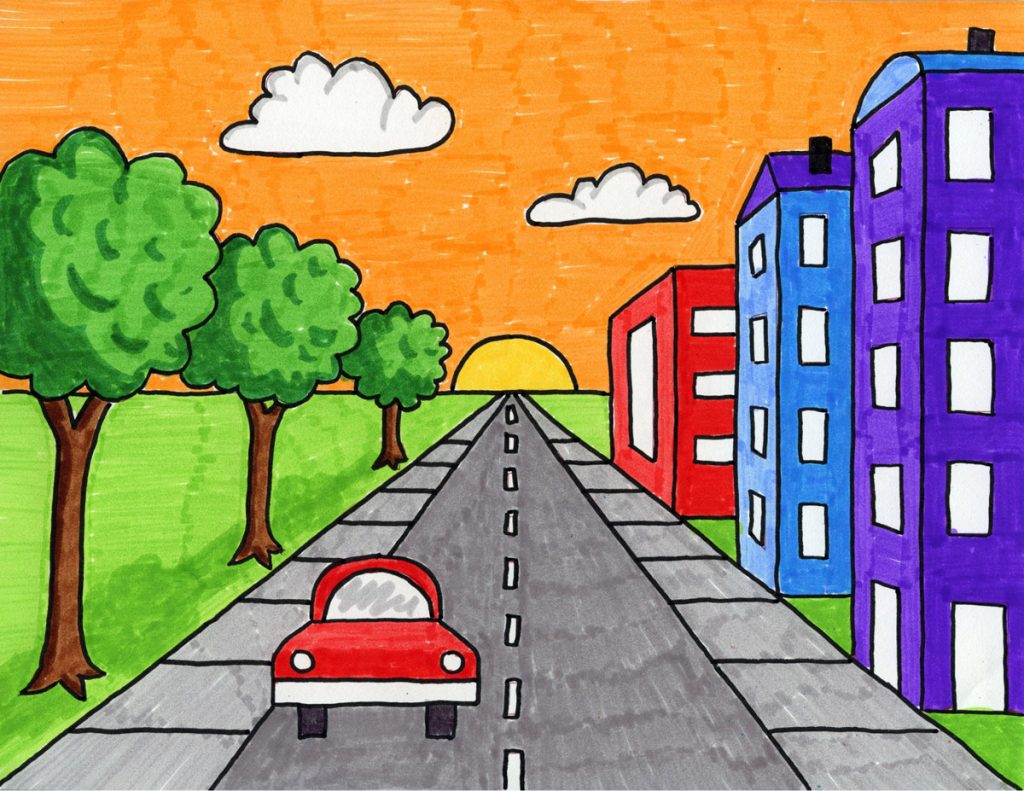
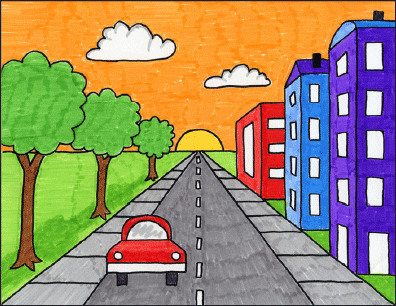
One Point Perspective Drawing Cityscape
Draw a City with One Point Perspective
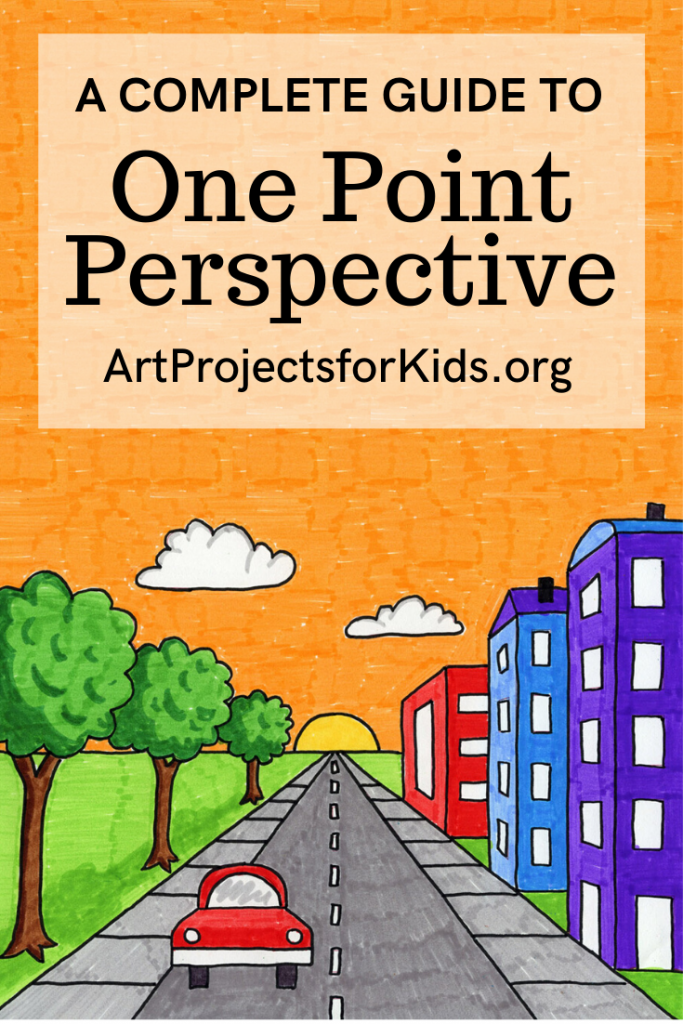
Below you'll find an easy step-by-step How to Draw a City with One Point Perspective tutorial. The download comes with guides and instructions.
Introducing the idea of one point perspective to older elementary students, may be a totally new idea to them, so it really helps to do it in an very structured way. The principles are easier to see when you draw similar shaped buildings and similar shaped trees help keep any confusion to a minimum.
When I was new to teaching years ago, I tried to having fifth grade students draw their own guides, but most found it so frustrating that they never even got to their buildings.
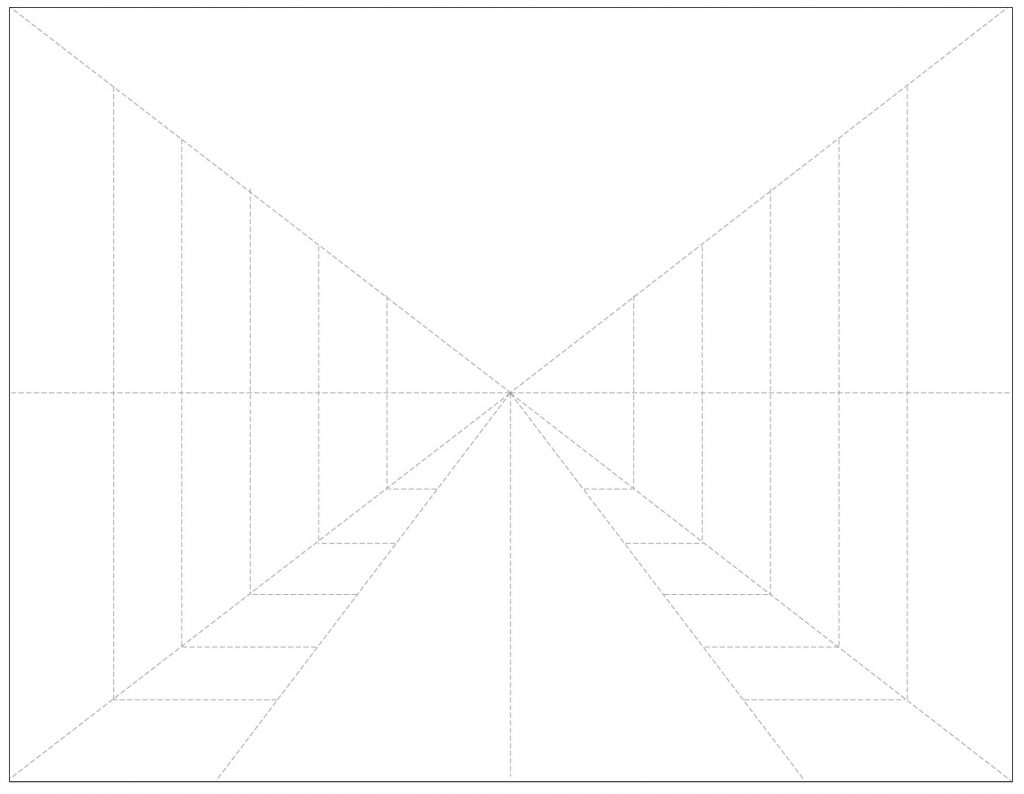
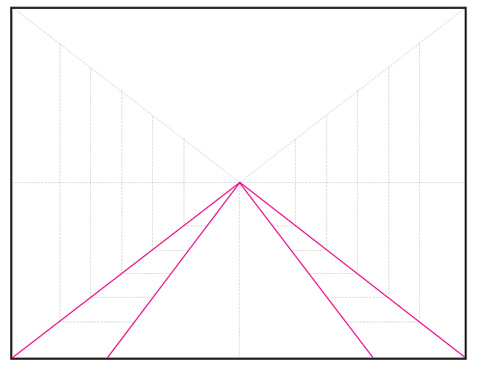
So if any of your students end up going on to architecture school, they can learn to make their own one (and two!) point guides, but meanwhile, others can get the idea by using my guide on page 3 of the download I created. It tells them how tall the trees and buildings should be, but leaves room for creative interpretation. In other words, it's easy to see where the buildings and trees need to be, but how the details inside are totally up to them.
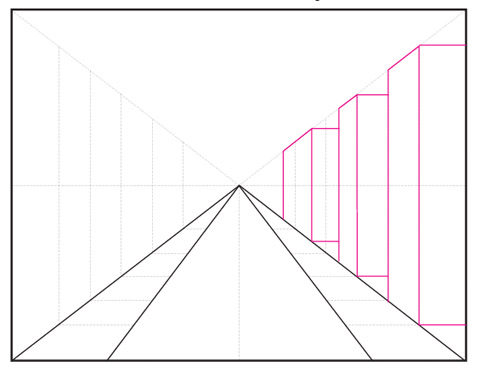
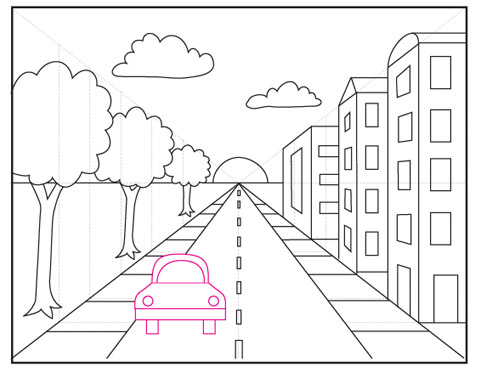
Preview of Template Drawing Guide
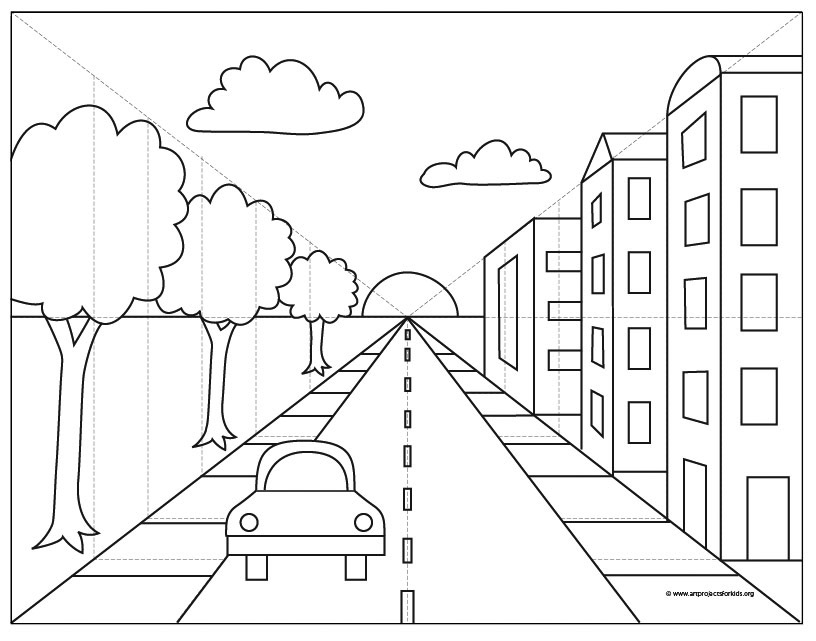
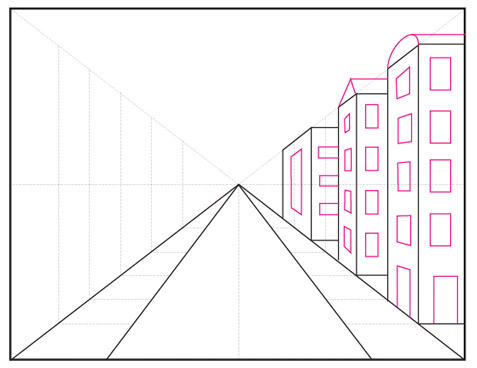
Preview of a Sample Line Drawing
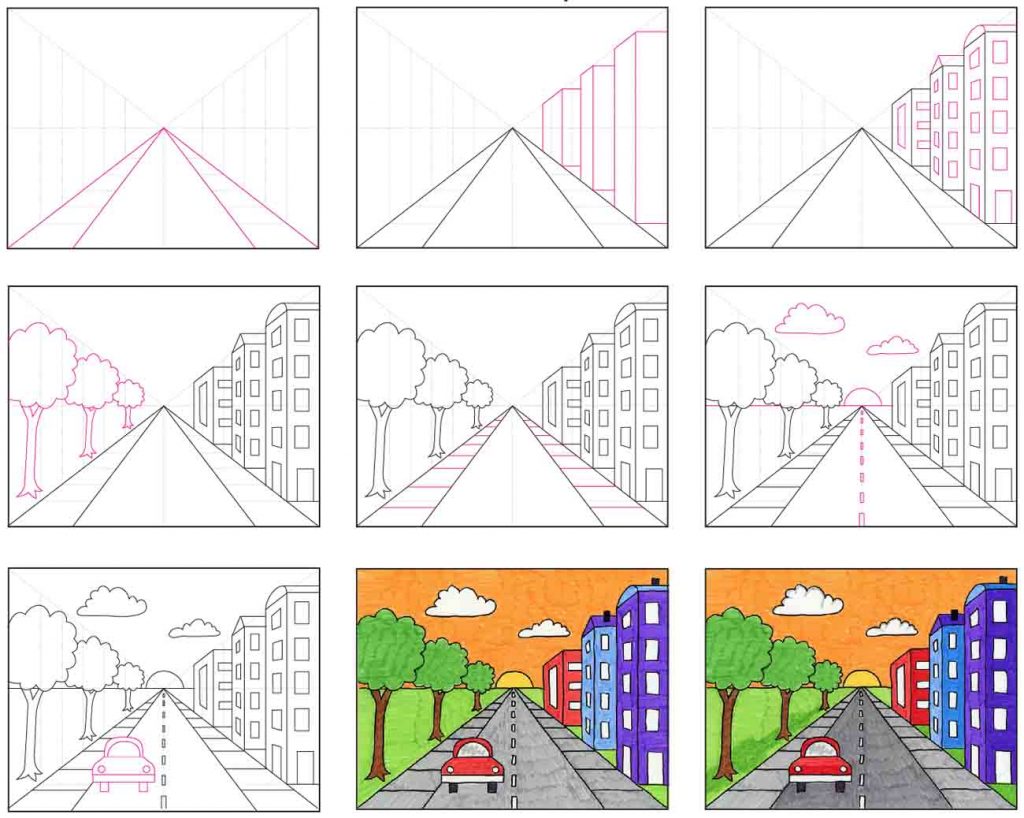
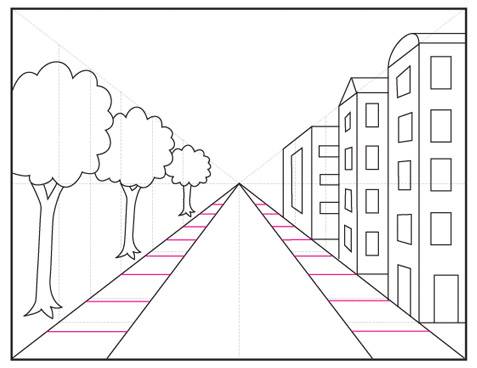
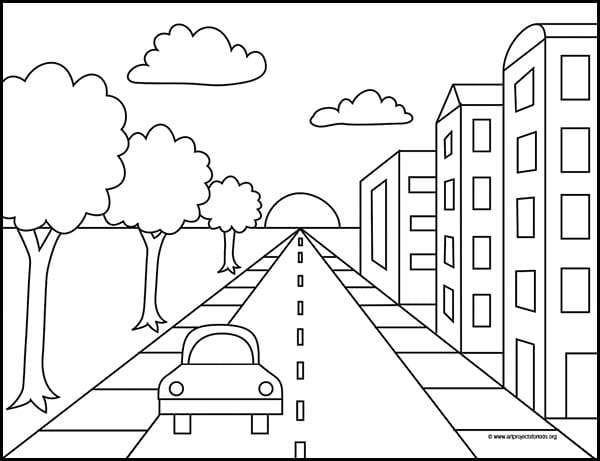
Preview of the Step by Step Tutorial
Time Lapse Drawing of a City with One Point Perspective
MATERIALS

Note: This post contains affiliate links. If you click and take action, I will be compensated a small amount at no expense to you.
- Drawing Paper. Don't substitute it with copy paper or construction paper. The surface will get fuzzy, erasing might cause holes, and the colors will generally not look as bright.
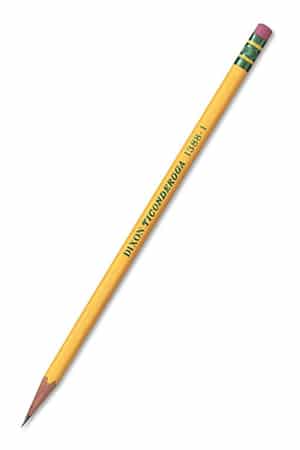
- Pencil. The Ticonderoga brand are the most reliable, make nice dark lines when you need them, and are the easiest to erase.
- Eraser. Large ones you can hold in your hand do a much better job than just the pencil tips.Stabilo Markers. They have the best colors, the best tips, and last the longest.

- Black Sharpie Marker. These fine point permanent markers make nice black lines, have a good tip for coloring, and never bleed when they get wet. Use them in areas with good ventilation and add extra paper underneath for table protection.
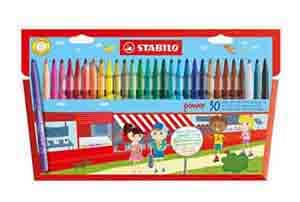
- Stabilo Markers. The large pack provides lots of fun color choices, several shades of each color, including a few choices for skin. The tips are perfect for coloring, and there's even a promise that they will work after being uncapped for 8 weeks!
DIRECTIONS
Time needed:1 hour.
Draw a City with One Point Perspective
- Follow the guides to draw a road.
- Start the buildings on one side.
- Add windows, doors and details.
- Draw a set of trees that get smaller.

- Add horizontal lines.
- Add a dashed center line, horizon and clouds.
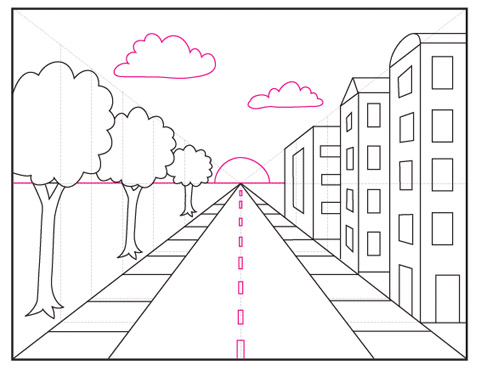
- Draw a car somewhere on the road.
- Trace and color with markers.
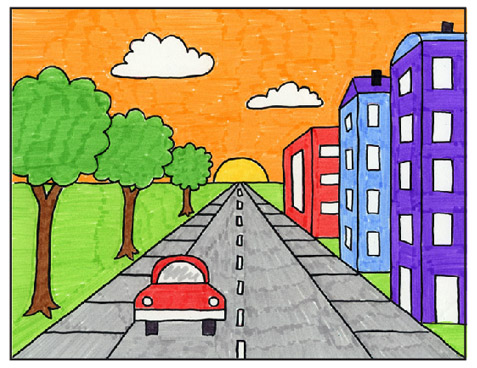
- Add another layer of marker color to make shadows.

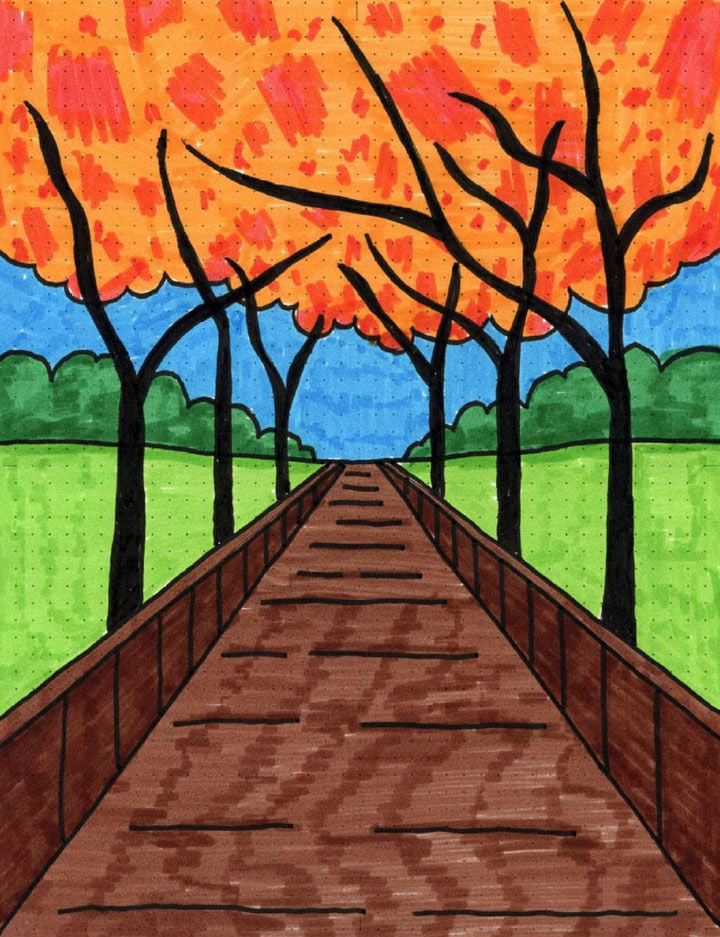
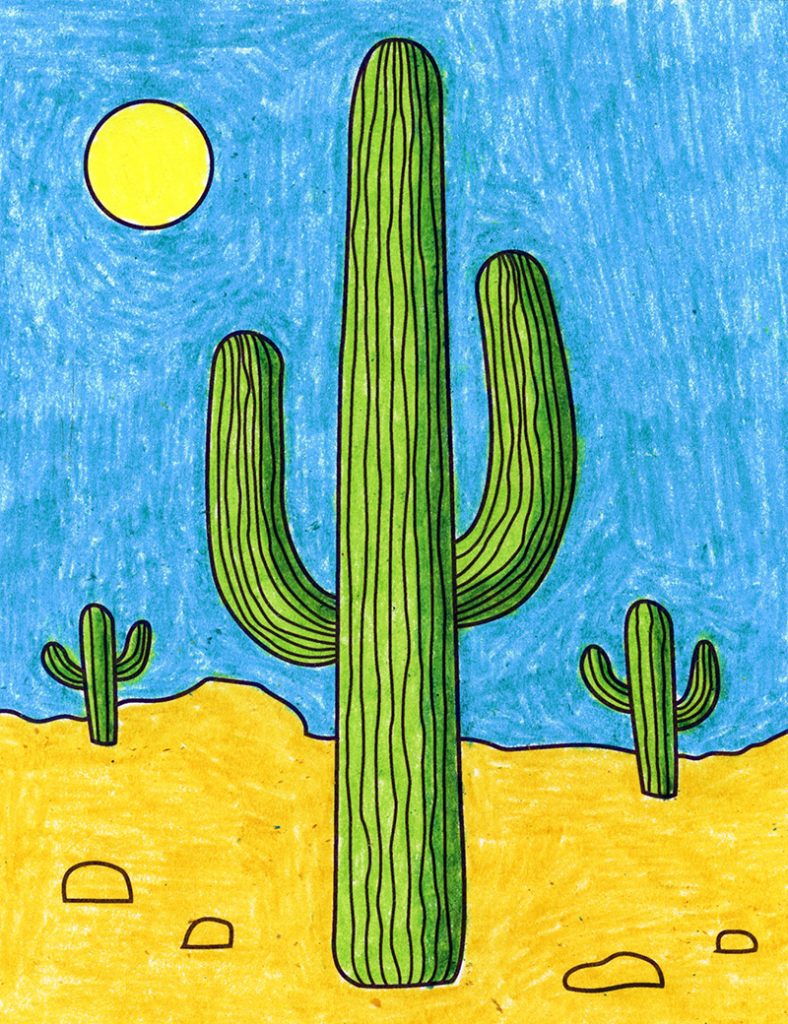
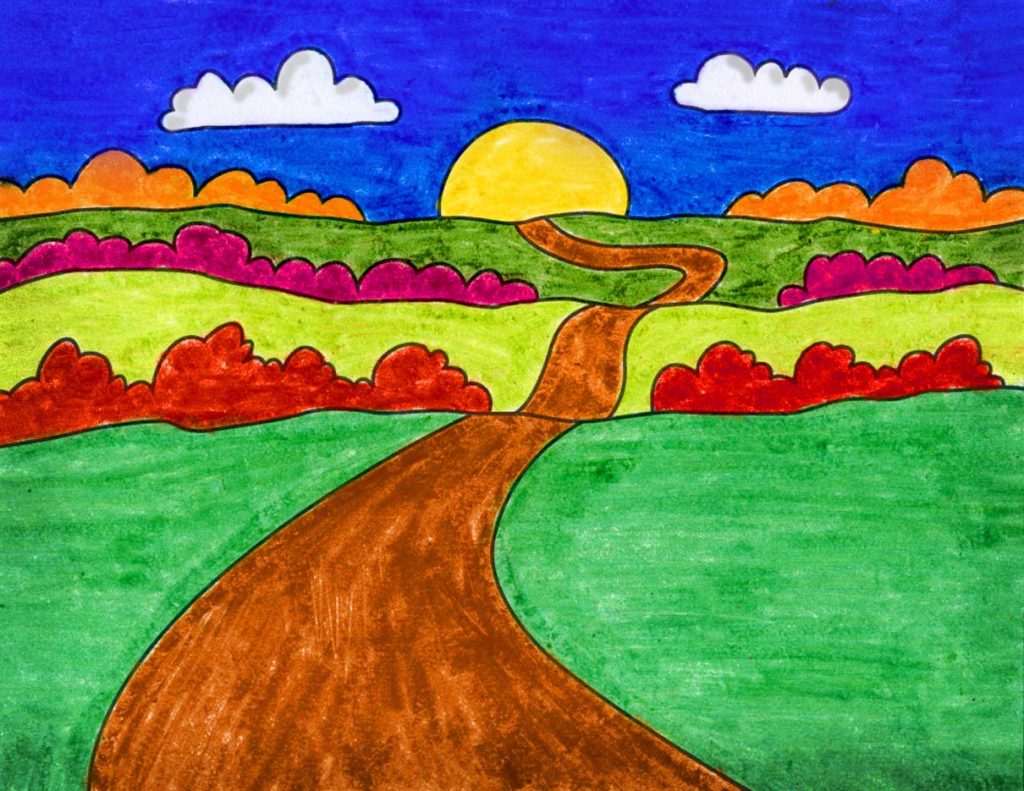
More Landscape Drawing Projects

Click to see my Gallery of Free Drawing Lessons

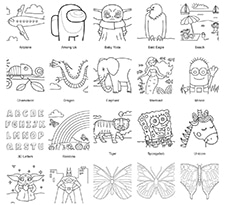
Visit my Coloring Page Gallery
If you are a fan of this City drawing, I'd like to offer another option. Busy teachers and parents can now just click on my new Coloring Page Gallery to find lots more coloring page options. Download and print as often as you want, for whatever kind of project you want. Use it for younger students that want in on the coloring fun, or as a full size visual aid for those that are just learning how to draw. It's never been easier to see and download so many coloring pages all in one place!
Save me to your Pinterest Board!
One Point Perspective Drawing Cityscape
Source: https://artprojectsforkids.org/draw-a-city-with-one-point-perspective/
Posted by: leclaircamigat.blogspot.com
0 Response to "One Point Perspective Drawing Cityscape"
Post a Comment