

How To Create A New Outlook Account
Microsoft Outlook is a great email tool that comes with MS Office, but it's not free. If you're looking for an email with some of the same features as Outlook but for less cost, consider creating a free Outlook.com email account.
Outlook.com is a free web-based email service that offers many convenient features. If you're already familiar with Microsoft Outlook and looking for a new, inexpensive web-based email, consider using Outlook.com. It's also a good choice for an email provider if MS Office compatibility is important.
In this tutorial, discover the advantages of using an Outlook.com email account. Learn how to sign up to create a new Outlook.com email account with our short video and step-by-step written instructions.
Guide to Inbox Zero Mastery (Free eBook Download)
Before you set up your new Outlook.com email account, I wanted to make you aware of a free resource we've got that complements this tutorial. Our Free eBook: The Ultimate Guide to Inbox Zero Mastery is filled with inbox organization strategies and killer tips to help you manage all your incoming email more efficiently.


What Is Outlook.com?
With all the variations of Microsoft email around, telling them apart can be confusing. Let's take a closer look at Microsoft's Outlook.com email.
Outlook.com is Microsoft's free personal email service. It's a web-based email services that integrates will with Office applications and other popular tools.
Outlook.com has replaced Hotmail, which was an early free online email service that had been around since 1996. All Hotmail email users are being migrated to Outlook.com and new Hotmail accounts can't be created.
7 Advantages of Outlook.com Free Email
As an email service, Outlook.com has a lot to offer. Here are just some of the helpful features you can expect to find:
- Focused Inbox. Use this feature to make sure that you see your most important email messages. Messages that Outlook.com determines to be unimportant are automatically filtered to the Other tab. If you receive dozens of emails each day, this feature can help save you time. If you don't like the feature, however, you can turn it off
- Storage. Outlook.com offers users 15 GB storage for free account users. Office 365 (premium) users get additional storage for their email accounts. You can also use cloud storage in Microsoft's OneDrive to save attachments and messages.
- Outlook.com Add-ins. The many available Add-ins allow you to expand the way you use your Outlook.com email. Add-ins are available through the Microsoft Appsource or from within Outlook.com. Add-ins allow you to integrate Outlook.com with many popular tools such as Evernote, PayPal, and FedEx.
- Dark mode. Brightly lit computer and device screens can cause eye strain. With dark mode you can dim the brightness of your email background, which may help your eyes. Dark mode is super easy turn on and off using the toggle switch under Outlook.com settings.
- Automated bill pay reminders. Outlook will scan your email to identify bills you receive. To remind you it'll add the due date to your calendar and send you an email reminder two days before the bill is due. If you receive a lot of email notifications of bills, this could be very useful.
- Sweep Tool. With the Sweep tool you can quickly organize your Outlook.com email inbox by automatically moving email messages from one or more specified senders out of your inbox. Use sweep to delete email messages, archive them, or move them to a specific folder.
- Free. If you're on a limited budget, Outlook.com is a free email account with lots of top-notch features. As your needs grow, you've got the option to upgrade to Office 365. If you're starting out, this could be the right email choice for you.
It's also important to realize that your free Outlook.com email account will have ads, which could be a disadvantage for some. To avoid ads, upgrade to the paid version of Outlook.com with Office 365.
For an in-depth comparison between Outlook.com and Gmail (another free web-based email service), study this tutorial:
You can find a listing of even more free email providers here:
Your Quick Start Guide to Creating an Outlook.com Email Account
Learn how to set up your own free Outlook.com email account in this short video.
1. How to Create a New Outlook.com Account
To create your own Outlook free email account, follow the steps below:
Step 1. Start at the Outlook Sign Up Page
To create your Outlook.com account, go to the URL for the Outlook sign up page. The sign up page looks like this:
.jpg)
.jpg)
.jpg)
To create an Outlook account, click the Create free account button.
Step 2. Choose an Account Name and Password
The first prompt that appears after the Outlook sign up page asks you to choose a user name for your new Outlook.com email:
.jpg)
.jpg)
.jpg)
Type your desired username and click the Next button.
Be sure to choose a user name that's easy to remember. If you'll use this email for business purposes, choose a professional-sounding user name. You may find your desired username has already been claimed. if this is the case, try a variation.
Note: By default, your free Outlook.com account user name will have the extension "outlook.com."
Next, you're prompted to create a password for your new Outlook email:
.jpg)
.jpg)
.jpg)
Type a password for your Outlook.com account. Click the Next button when you're done.
To keep your account secure, choose a password that won't be easy to guess. This tutorial includes some good tips for creating strong passwords:
Tip: Once you've set up your password, use a secure password storage tool such as Dashlane, Keeper, or LastPass to store your password. NEVER write your password on a sticky note attached to your monitor.
Step 3. Enter Additional Details
Next, Outlook.com prompts you to enter your name:
.jpg)
.jpg)
.jpg)
Type your first and last name. Click the Next button when you've finished. You'll be prompted to add additional details:
.jpg)
.jpg)
.jpg)
Select your Country/region using the down arrow to the right of the field. Select your birthdate using the down arrows next to the Month, Day, and Year fields. Click the Next button when you're done.
Step 4. Verify That You're a Person
Next, you're ask to verify that you're a person by typing the characters from a CAPTCHA:
.jpg)
.jpg)
.jpg)
Type the characters from the CAPTCHA. Click the Next button when you're done. The Welcome screen displays.
2. Set Up Your New Outlook.com Account
Once you've chosen a username and password, Outlook.com takes you through some basic account settings. Start from the Welcome screen:
.jpg)
.jpg)
.jpg)
To start setting up your Outlook.com email from the Welcome screen, click the arrow to the right of your name. You'll be guided through various prompts that'll help you finish setting up your account.
Step 1. Choose a Language and Time Zone
The first prompt you'll see asks you to choose a language and time zone:
.jpg)
.jpg)
.jpg)
Use the arrows to the right of the Language and Time zone files to make your choices. When you've finished making your select, click the right arrow to move forward in the Outlook email setup process.
Note: At any point during the setup process, you can use the left arrow to move backwards. Use the right arrow to move forwards.
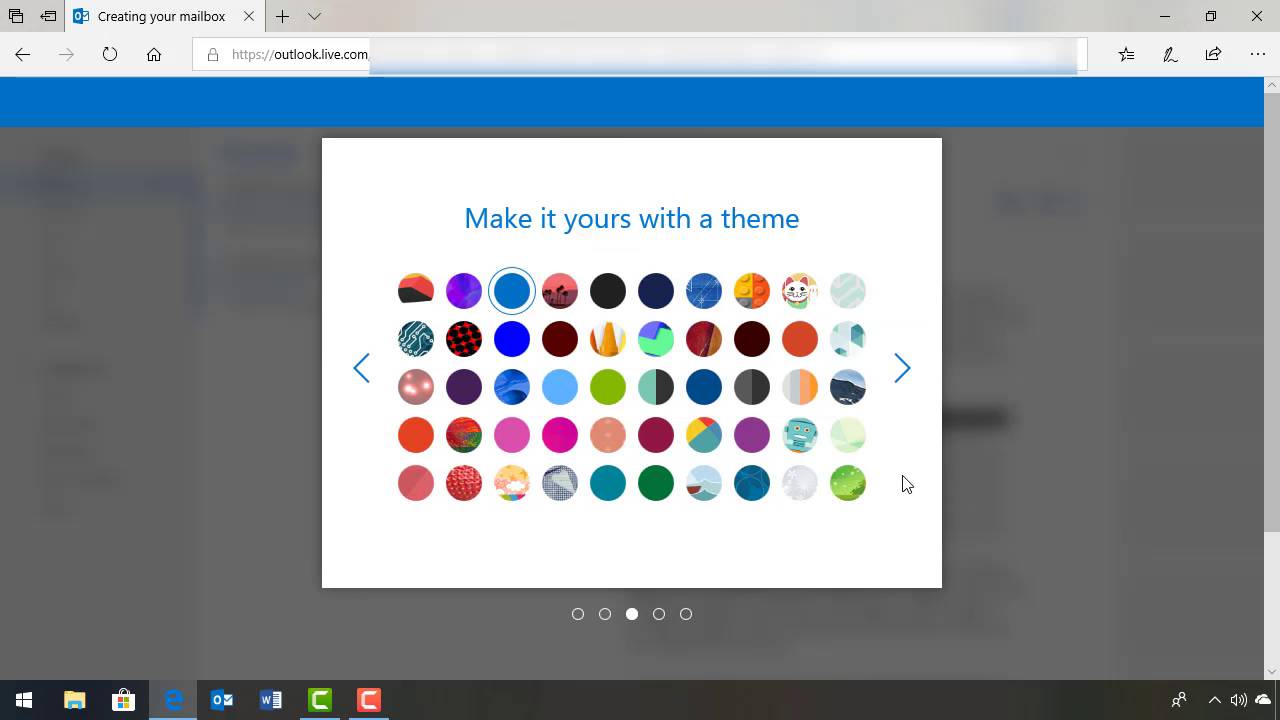
Step 2. Select a Theme
The next prompt gives you a choice between 50 themes:
.jpg)
.jpg)
.jpg)
Click on the theme you want to use to select it. When you've made your choice, click the right arrow. The email theme you select defines the colors and look of your Outlook.com email.
Step 3. Add a Signature
After you select your theme, you'll see a strip with your selected theme at the top of the next screen. The next screen prompts you to add an email signature:
.jpg)
.jpg)
.jpg)
The email signature you define here will appear on all the emails you send from your Outlook.com account unless you turn it off.
You could type text in the box, but for a truly professional look try adding a signature based on professional email signature template such as those available through Envato Elements and GraphicRiver.
To add a professional email graphic created from a template, click on the Insert Image icon. Browse to find your email signature image.
You can learn more about email signatures in these tutorials:
Step 4. Add a Calendar
The next screen prompts you to add a calendar to your new Outlook email:
.jpg)
.jpg)
.jpg)
To start, choose between a Local calendar, a MLB (Major League Baseball), or a MLS (Major League Soccer). Click on the icon for the type of calendar you wish to use. For this example I'll add a Major League Soccer calendar:
.jpg)
.jpg)
.jpg)
Click the soccer team whose calendar you'd like to add to your email account's calendar. For this example, I chose the FC Dallas team. When you've finished, click the right arrow to move to the next screen. Choosing a team calendar adds their games to your calendar in Outlook.com.
Step 5. Add Outlook to Your Phone
The next screen prompts you to add your new Outlook email to your mobile phone:
.jpg)
.jpg)
.jpg)
To add Outlook.com to your phone, type your number and click the Get app button. Or, click the right arrow to skip this step.
3. Open your New Outlook.Com Email account
Once you've finished setting your new Outlook email, you'll be prompted to open your account and start using it:
.jpg)
.jpg)
.jpg)
Click the Let's go button to open your new Outlook email account. Your inbox displays:
.jpg)
.jpg)
.jpg)
Congratulations! You've just set up your new Outlook.com email account. You can now begin using it.
Note: You may be prompted to verify your account before you can send a message.
Learn to Manage Your New Outlook Email Inbox
Now that you've learned how to create an Outlook account, you'll want to learn how to manage your new email inbox. We've got the perfect resource for that: The Ultimate Guide to Inbox Zero Mastery. The eBook is free when you sign up for our Tuts+ business newsletter.


Are You Using Outlook's Free Email Account? Share Your Thoughts and Tips
You've just learned about the advantages of Microsoft Outlook.com email. You've also learned how to create your own Outlook email. Now that you've set up your new email account, let us know what you think? What are your favorite Outlook.com features? Share your thoughts in the comments below.
How To Create A New Outlook Account
Source: https://business.tutsplus.com/tutorials/create-new-outlook-email-account--cms-32061
Posted by: leclaircamigat.blogspot.com
0 Response to "How To Create A New Outlook Account"
Post a Comment